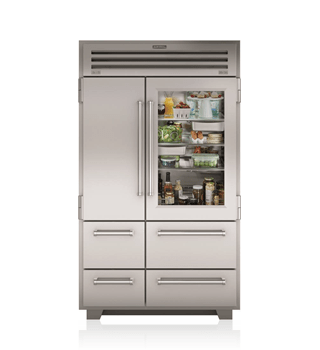
Your Sub Zero refrigerator is a masterpiece of luxury and performance—but like any appliance, parts wear out. One of the most common culprits behind poor cooling and energy inefficiency is a worn-out door seal (also called a gasket). If you’ve noticed condensation, frost buildup, or higher energy bills, your refrigerator’s door seal might be the reason.
In this blog post, you’ll learn exactly how to replace a Sub Zero refrigerator door seal with easy, step-by-step instructions. This guide is designed to be 60% informational (so you understand what you’re doing) and 40% transactional, so if you need professional help, you know exactly where to turn.
Let’s get started!
Why Replacing Your Sub Zero Door Seal Matters
The door seal plays a critical role in keeping cold air inside and warm air out. Over time, it can lose elasticity or crack, leading to:
-
Higher electricity bills
-
Frost accumulation inside the fridge or freezer
-
Food spoilage due to fluctuating temperatures
-
Overworking of the compressor
By replacing the door seal, you improve your refrigerator’s energy efficiency and lifespan.
Signs Your Sub Zero Door Seal Needs Replacing
Here’s how to know it’s time to replace your gasket:
-
The seal is cracked or visibly damaged
-
The door doesn’t close tightly
-
You feel cold air escaping from the edges
-
Moisture or mold buildup around the seal
-
The dollar-bill test fails (more on this below)
Tools You’ll Need
Before starting, gather the following tools:
| Tool | Purpose |
|---|---|
| Flathead screwdriver | Helps remove old seal |
| Allen wrench | For removing door panels (if needed) |
| Replacement gasket | Must be Sub Zero-compatible |
| Warm water & soap | To clean the gasket area |
| Hair dryer (optional) | To soften new gasket for easier installation |
💡 Pro Tip: You can find Sub-Zero-compatible gaskets at Fix SubZero Refrigerator.
Step-by-Step Instructions: How to Replace Sub Zero Refrigerator Door Seal
Step 1: Perform the Dollar Bill Test
Close the fridge door on a dollar bill and try to pull it out. If it slides out easily, the gasket isn’t sealing properly and needs to be replaced.
Step 2: Order the Right Gasket
Not all gaskets are created equal. You need one that matches your Sub Zero model number. This number can usually be found on a label inside the fridge near the top or side wall.
Once you have your model number, you can order the correct gasket from a trusted provider or consult the professionals at Fix Sub Zero Refrigerator to avoid compatibility issues.
Step 3: Remove the Old Gasket
-
Open the refrigerator door fully.
-
Start pulling the gasket from one corner. Most Sub Zero gaskets are attached with screws or a metal retainer.
-
Use a screwdriver or Allen wrench to carefully remove the screws, if necessary.
-
Remove the entire gasket, inspecting the door frame for any leftover adhesive or debris.
Step 4: Clean the Surface
Using warm, soapy water or a mild cleaner, scrub the gasket channel to remove any grease or grime. Let the area dry thoroughly.
Step 5: Soften the New Gasket
Place the new gasket in warm water or use a hair dryer to soften the rubber. This makes it easier to fit into the channel and helps it form a better seal.
Step 6: Install the New Gasket
-
Align the new gasket starting at the top corner.
-
Press it into the channel gently, working your way down.
-
If your model has screws, secure the gasket in place.
-
Check to ensure the gasket sits evenly all around the door.
Step 7: Test the Seal
Shut the door and repeat the dollar bill test. You should now feel firm resistance when you pull the bill. Also, observe over the next 24 hours for improved cooling and no air leakage.
How Long Does It Take to Replace a Sub-Zero Door Seal?
This DIY project can take between 30 minutes to 1 hour, depending on your comfort level. However, if you’re not confident, a certified technician can do it much faster.
Common Mistakes to Avoid
-
Ordering the wrong gasket: Always double-check the model number.
-
Forcing the gasket into place: Warm it first to make it pliable.
-
Not cleaning the surface properly: A dirty surface reduces the seal’s effectiveness.
-
Skipping the test: Always test the seal after installation.
When to Call a Professional
If you’re unsure about the model number, the gasket doesn’t seem to fit properly, or you’re experiencing cooling issues even after replacement, it’s time to consult an expert. You can schedule a Sub Zero refrigerator repair directly with certified technicians at Fix Sub-Zero Refrigerator.
They offer:
-
Factory-certified Sub-Zero parts
-
Same-day service
-
Warranty-backed repairs
Benefits of Replacing Your Door Seal
| Benefit | Description |
|---|---|
| Improved Efficiency | Keeps cold air in, saving on energy costs |
| Extended Lifespan | Reduces strain on the compressor |
| Better Food Preservation | Maintains stable temperature |
| Quiet Operation | Prevents the motor from overworking |
| Mold Prevention | Blocks external moisture |
FAQs About Replacing Sub Zero Refrigerator Door Seals
1. How often should I replace the door seal on my Sub Zero refrigerator?
Every 3–5 years or when it shows signs of wear.
2. Can I install the new gasket without removing the door?
Yes, most Sub-Zero models allow gasket replacement without full door removal.
3. Where can I buy an original Sub-Zero gasket?
You can order OEM parts from Fix SubZero Refrigerator.
4. What if the new gasket doesn’t seal properly?
Try warming it again with a hair dryer. If the issue persists, call a repair professional.
5. Is replacing the gasket covered under warranty?
Check your Sub-Zero warranty—gaskets may be covered within the first year.
6. What happens if I don’t replace a bad gasket?
Expect higher energy bills, spoiled food, and long-term damage to the fridge’s cooling system.
Conclusion: Keep Your Sub Zero Running Like New
Replacing your Sub Zero refrigerator door seal is a small fix with big benefits. Whether you’re a confident DIYer or prefer to call in the pros, ensuring a tight seal protects your food and your investment.
For peace of mind and professional service, trust the experts at Fix Sub Zero Refrigerator—your go-to source for Sub Zero repairs and part replacements.