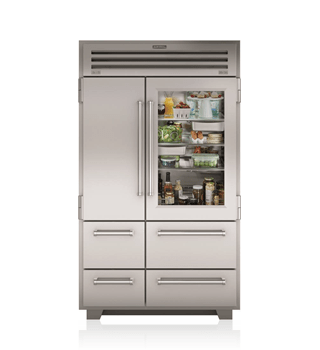
When your Sub Zero refrigerator light goes out, it’s not just inconvenient—it can be frustrating, especially during a late-night snack run. Fortunately, changing the bulb is usually a simple process. This blog post walks you through the safe and effective way to replace Sub-Zero refrigerator light bulbs. Plus, we’ll cover how to avoid damaging your high-end appliance and what to do if a DIY fix doesn’t cut it.
Why Do Sub Zero Refrigerator Lights Burn Out?
Light bulbs in Sub Zero refrigerators typically last for years, but over time they naturally wear out due to:
-
Frequent door opening and closing
-
Voltage fluctuations
-
Age of the appliance
-
Overheating from faulty sockets or circuitry
Knowing the root cause can help you decide whether it’s just the bulb or if your refrigerator might need a more thorough inspection.
What Type of Bulb Does a Sub Zero Refrigerator Use?
Sub Zero models usually use 40-watt appliance bulbs or LED replacement lights depending on the model. Always check your refrigerator’s user manual or inside the appliance door for bulb specifications. Using the wrong type can damage the socket or circuitry.
Essential Tools You’ll Need
Before diving into the steps, gather the following:
| Tool/Item | Purpose |
|---|---|
| Replacement bulb | Ensure compatibility |
| Gloves or towel | Protect hands & bulb surface |
| Flashlight | Improve visibility |
| Screwdriver (if needed) | For models with bulb covers |
Step-by-Step Guide to Replacing Sub Zero Refrigerator Light Bulbs
Step 1: Turn Off the Power
Always unplug your refrigerator or switch off the circuit breaker. This prevents electric shocks and ensures safety while working around the bulb socket.
Step 2: Locate the Bulb
Most Sub Zero bulbs are located:
-
Inside the main compartment (typically near the top)
-
Behind a plastic or glass cover
-
In the freezer (for side-by-side or bottom freezer models)
Step 3: Remove the Light Cover
Use a flathead screwdriver if necessary. Gently pry open the cover without applying too much pressure to avoid cracking the plastic or glass.
Step 4: Unscrew the Old Bulb
Turn the bulb counterclockwise to remove. If the bulb is stuck, wear gloves or use a dry towel to improve your grip. Avoid twisting too hard.
Step 5: Insert the New Bulb
Screw the new bulb in clockwise. Ensure it’s snug but not overly tight. Use an LED replacement bulb for energy efficiency and longevity.
Step 6: Replace the Cover and Restore Power
Snap the light cover back in place and plug the unit back in. Open the fridge door—your light should now shine bright and clear!
Safety Tips You Shouldn’t Ignore
-
Don’t use wet hands when replacing bulbs
-
Avoid touching LED bulbs directly with bare hands—use gloves
-
Double-check compatibility before installation
-
Never force a bulb if it doesn’t fit
-
Don’t use non-appliance-rated bulbs—they can overheat
Common Mistakes and How to Avoid Them
| Mistake | Solution |
|---|---|
| Using the wrong bulb type | Refer to user manual or call a pro for guidance |
| Forcing a tight bulb | Use gloves for grip and gently twist |
| Forgetting to cut power | Always unplug the fridge or shut off the breaker |
| Ignoring flickering lights | Might signal deeper issues—call a technician |
When It’s More Than Just a Light Bulb
Sometimes, a burnt-out bulb is a symptom of a bigger issue. If your lights frequently go out or flicker, the problem could be:
-
Faulty wiring
-
Damaged sockets
-
Circuit board issues
That’s when it’s time to call the pros at Fix Sub Zero Refrigerator. Their certified technicians offer comprehensive Sub Zero refrigerator repair services across all models, ensuring your appliance stays in top condition.
Why Choose a Professional for Light Bulb Issues?
While changing a light bulb sounds simple, with Sub Zero’s premium models, small mistakes can cause:
-
Internal wiring damage
-
Faulty connections
-
Broken covers or compartments
Hiring a professional ensures:
-
Correct bulb type and wattage
-
No risk of electrical damage
-
Peace of mind with expert handling
Signs You Need Professional Repair Services
-
Light still doesn’t work after replacement
-
Burn marks around the bulb socket
-
Buzzing or flickering lights
-
Strange smells from the appliance
All these are red flags that point to underlying electrical issues—don’t try to troubleshoot alone.
Schedule a Same-Day Service with Fix Sub Zero Refrigerator
Need help today? Schedule a same-day repair appointment with Fix Sub Zero Refrigerator, a trusted name in Sub Zero appliance servicing. Their techs are trained specifically on:
-
Light bulb and LED replacements
-
Socket repairs
-
Internal electrical inspections
Don’t wait until a small issue becomes a costly repair!
Frequently Asked Questions (FAQs)
1. Can I use any LED bulb in my Sub Zero refrigerator?
No. Only use bulbs rated for appliance use and compatible with your specific Sub Zero model. Check your manual or consult a technician.
2. How long do Sub Zero refrigerator bulbs typically last?
They generally last 2 to 5 years depending on usage, door activity, and bulb quality.
3. What should I do if the bulb still doesn’t work after replacement?
Check for loose connections or burnt sockets. If the issue persists, contact a repair specialist to inspect the internal wiring.
4. Is it safe to use a higher-watt bulb for better brightness?
No. Always stick to the recommended wattage. Using a higher-watt bulb can overheat and damage your refrigerator.
5. Do Sub Zero freezers have separate bulbs?
Yes, many models have dedicated bulbs for the freezer compartment. The replacement process is similar to that of the fridge section.
6. Can I schedule a home visit for just a bulb replacement?
Absolutely. Fix Sub Zero Refrigerator offers single-service appointments for quick fixes like bulb replacements and socket issues.
Conclusion: Brighten Up Your Fridge the Smart Way
Replacing your Sub-Zero refrigerator light bulb may be simple, but doing it wrong can be costly. Follow our steps carefully to keep your fridge well-lit and safe. And remember—when in doubt, call the experts at Fix Sub Zero Refrigerator for prompt, professional service.